Craft Ideas, Home & Workshop · Easy · 30 minutes
DIY Painted Key Rack From Reclaimed Wood
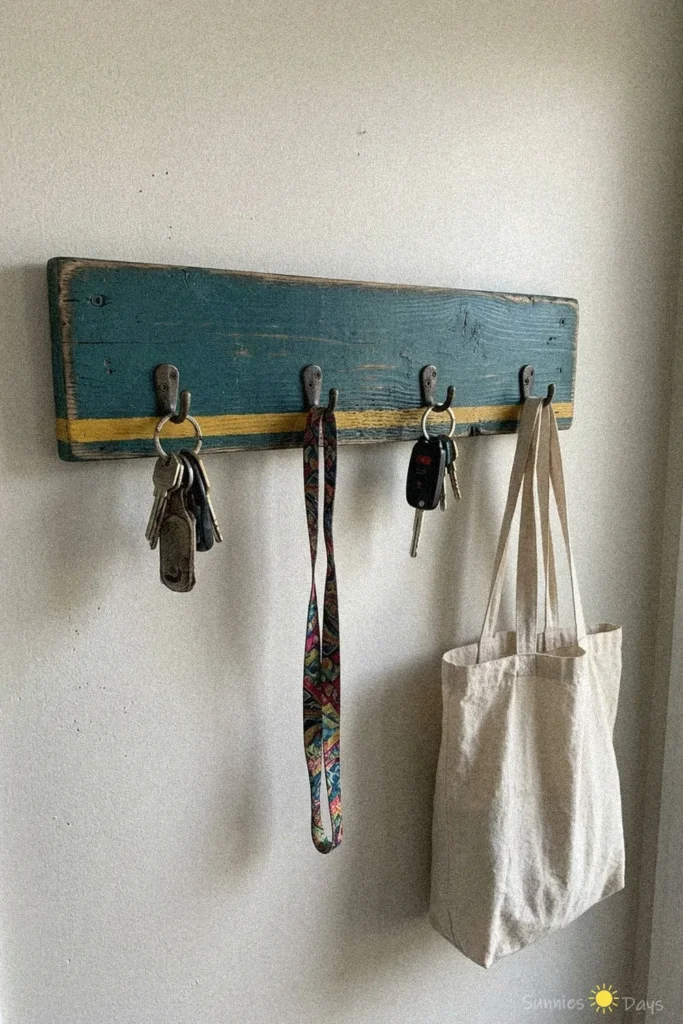
Create a DIY painted key rack from reclaimed wood to keep your keys, lanyards, and bags organized. This easy project adds a rustic touch to any entryway or mudroom.
- Difficulty
- Easy
- Time
- 30 minutes
Materials
- reclaimed wood plank
- sandpaper
- paint or wood stain
- paintbrush
- ruler
- pencil
- screws
- hooks
- screwdriver
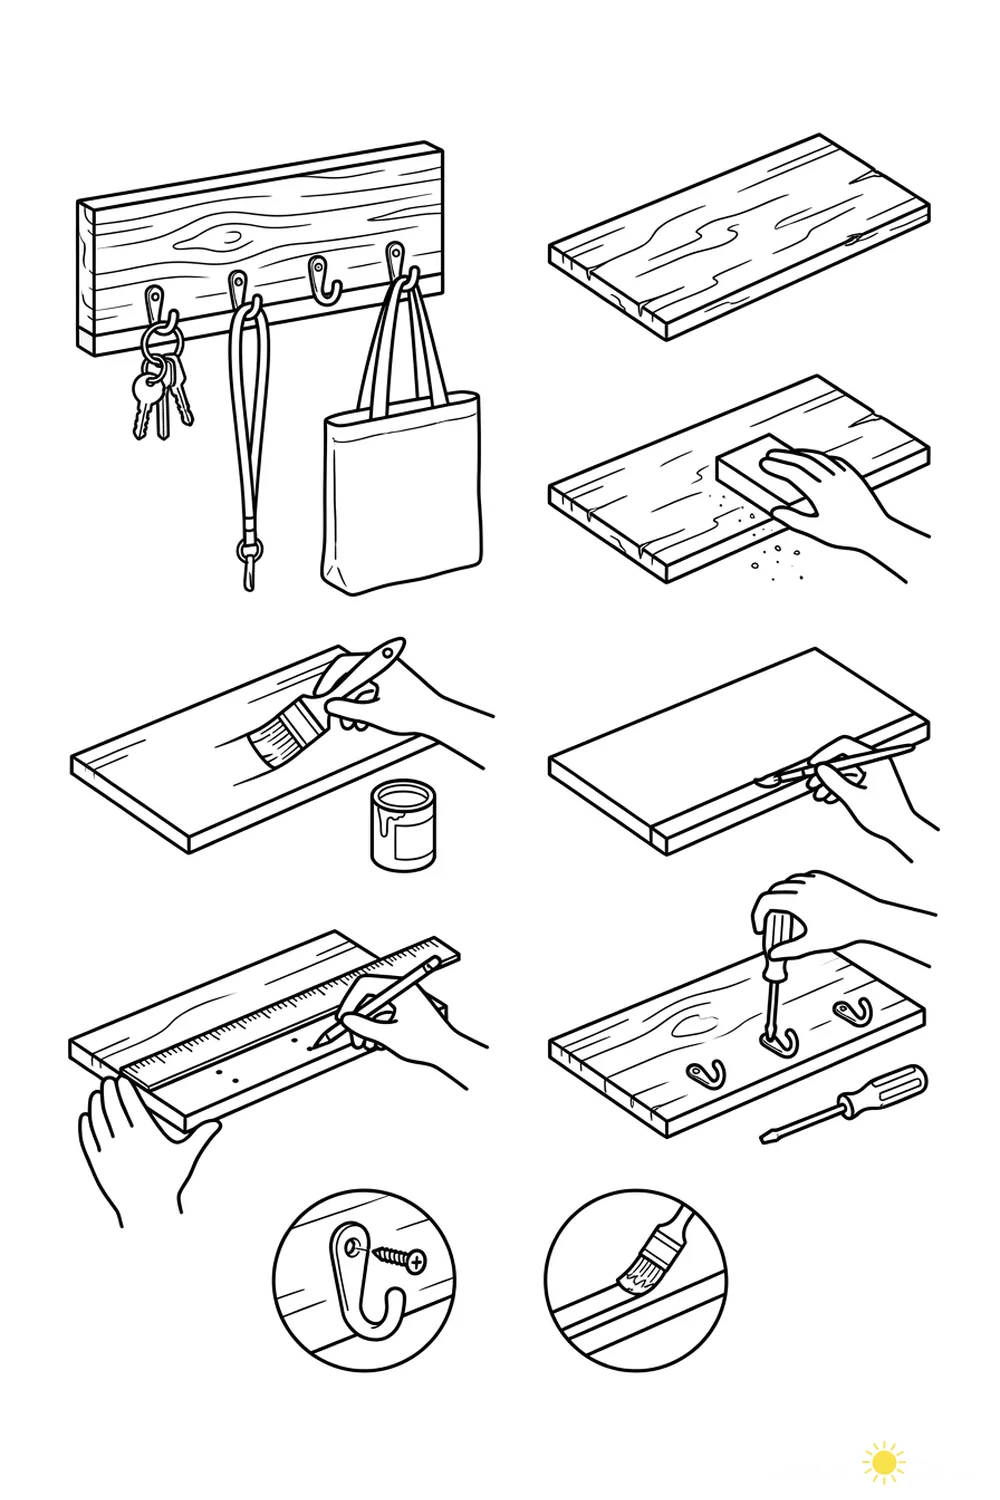
How to make it
- Sand the surface of the reclaimed wood plank.
- Paint or stain the wood and let it dry.
- Use a ruler and pencil to mark where the hooks will go.
- Screw the hooks into the marked spots.
- Mount or display your finished key rack.
A diy painted key rack is a simple and stylish way to organize your keys, lanyards, and bags in one convenient spot. This craft uses reclaimed wood and sturdy metal hooks to create a rustic, functional accent for your home.
The painted wood and distressed finish give it a charming, vintage look that stands out in any entryway. With multiple hooks, it keeps essentials easy to grab as you head out the door, reducing clutter and saving time.
When hanging your key rack, make sure it is securely fastened to the wall to safely hold heavier items like tote bags. Avoid overloading the hooks to maintain stability and prevent damage to your wall.