Craft Ideas, Home & Workshop · Easy · 30 minutes
DIY Painted Drawer Dividers for Home Organization
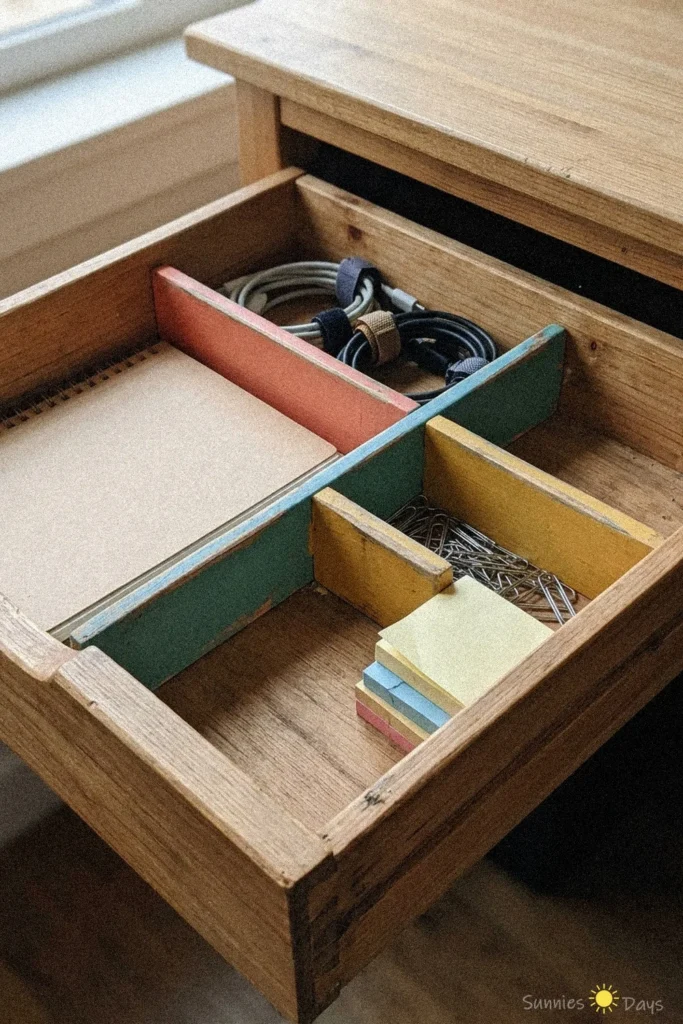
Make your own DIY painted drawer dividers for a fun and functional way to organize your workspace. This easy project adds a pop of color and keeps all your essentials in order.
- Difficulty
- Easy
- Time
- 30 minutes
Materials
- Wooden slats
- Saw
- Ruler
- Pencil
- Sandpaper
- Paint
- Paintbrush
- Wood glue
How to make it
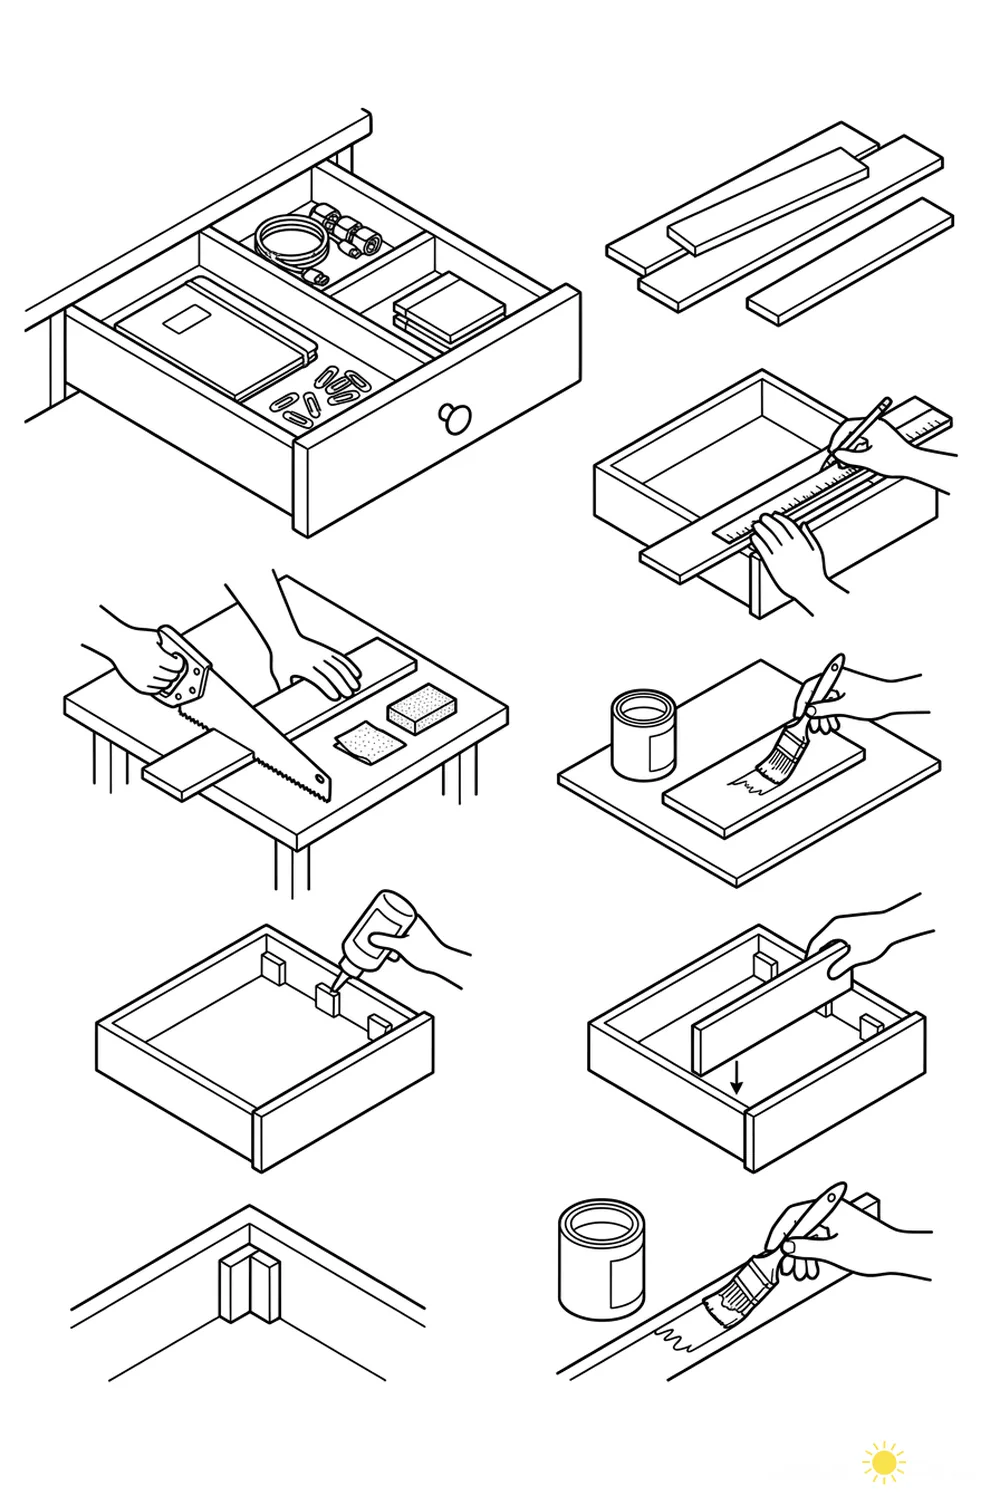
- Gather wooden slats and materials.
- Measure and mark the slats to fit your drawer.
- Cut the slats to size and sand the edges.
- Paint the slats and let them dry.
- Glue small blocks to the inside corners of the drawer.
- Insert and glue the painted dividers into place.
- Paint any additional trim pieces if desired.
DIY painted drawer dividers are a creative way to keep your workspace neat and organized. This craft is perfect for sorting office supplies, cables, notepads, and paper clips in a stylish manner.
The colorful painted sections make it easy to designate spots for different items, helping you find what you need quickly. It also adds a cheerful touch to your desk or home office.
When making drawer dividers, ensure the paint is fully dry before placing any items inside to avoid smudges or stains on your supplies.