Craft Ideas, Home & Workshop · Easy · 40 minutes
DIY Baking Sheet Rolling Cart Top for Craft Supplies
This DIY baking sheet rolling cart top is perfect for organizing and displaying your craft supplies. Keep your workspace neat and everything you need within reach.
- Difficulty
- Easy
- Time
- 40 minutes
Materials
- wooden frame pieces
- baking sheet
- casters
- screws
- paint or finish
- paintbrush
- storage bins
- folded towels or cloths
- small potted plant (optional)
How to make it
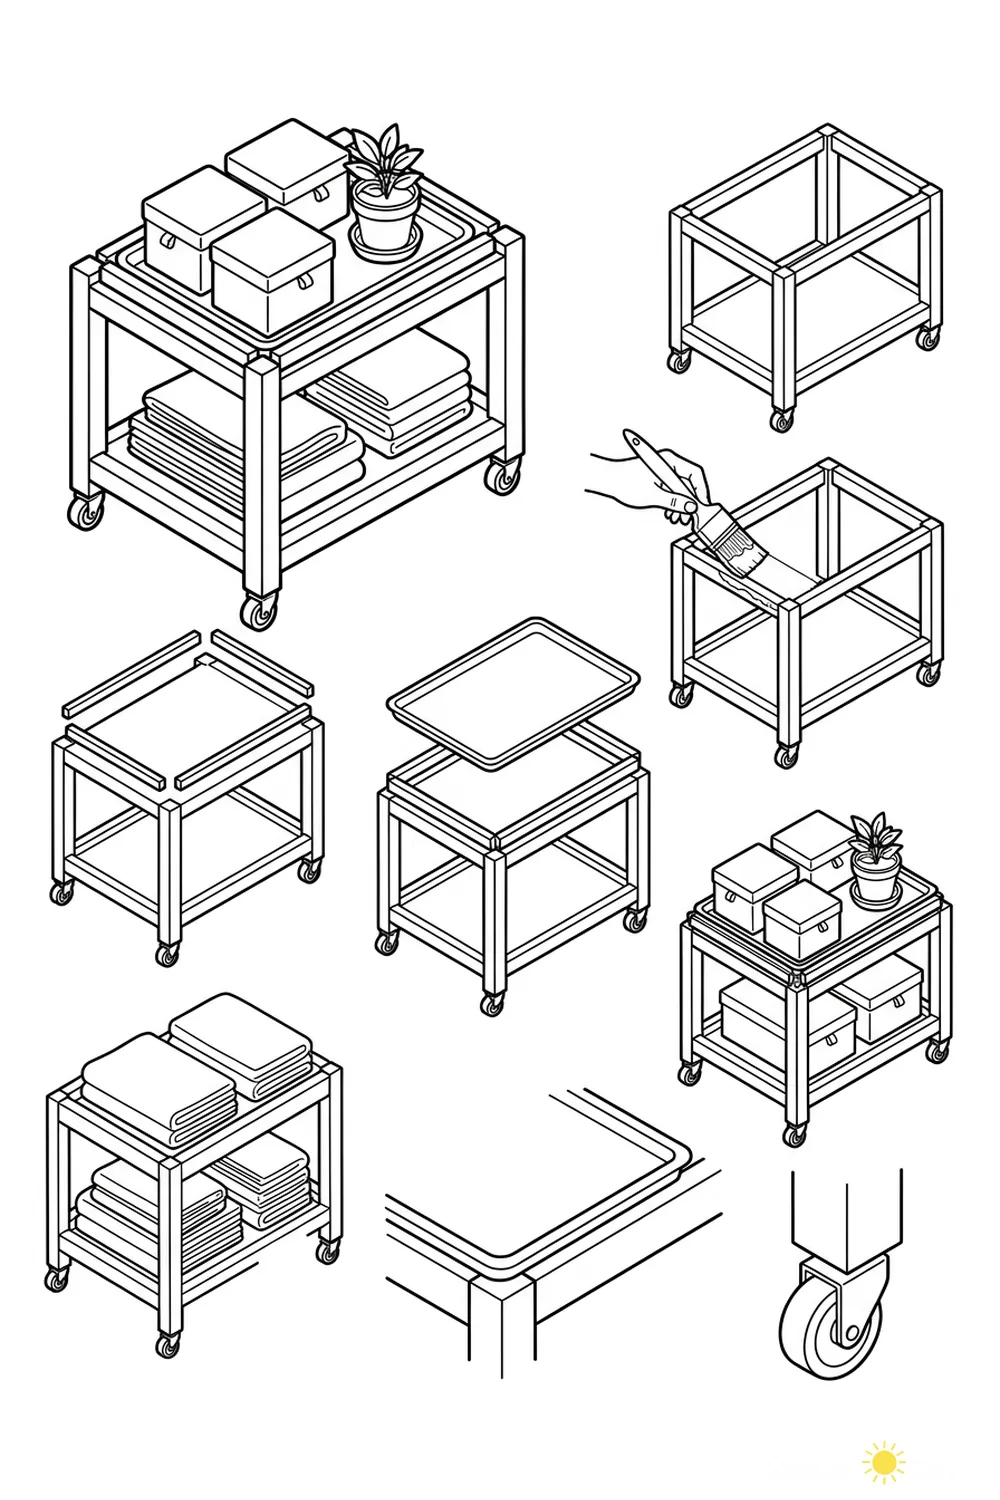
- Assemble the wooden frame with open sides and attach casters to the bottom.
- Paint or finish the frame for a polished look.
- Attach rails or supports to the top of the frame to hold the baking sheet.
- Place the baking sheet on top as a removable tray surface.
- Add a lower shelf for extra storage.
- Organize with storage bins and folded towels on the shelves.
- Place small items or decor on the top tray as desired.
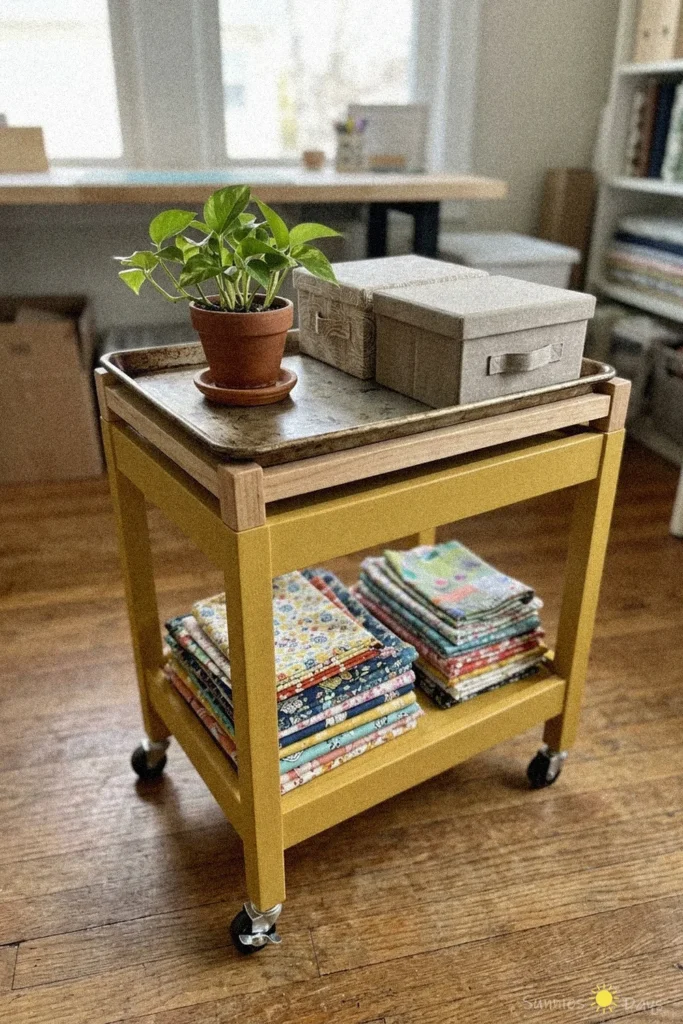
A diy baking sheet rolling cart is a creative way to organize and display your craft supplies while keeping them mobile and accessible. This project is perfect for crafters who want a tidy, functional workspace. The cart’s bright color and sturdy baking sheet top make it both practical and cheerful.
The rolling cart provides two levels of storage, with the top holding a potted plant and storage boxes, and the lower shelf stacked with neatly folded fabrics. Its mobility makes it easy to move supplies wherever you need them in your craft room.
When using a metal baking sheet as a cart top, make sure the edges are smooth to avoid accidental scratches. Place heavier items on the lower shelf to keep the cart stable while you work.