Ever wanted to take a pile of plain old cardboard and turn it into something your kids will talk about forever? That’s literally what this project does!
It starts out as just a few massive cardboard sheets, but step by step, it transforms into a full-on mini ice cream shop playhouse. It’s got everything—a serving window, a counter, a doorway, side windows, cute decorative roof trim, and all those little details that make any kid lose their mind with excitement the second they step inside!
Ever watched a bunch of plain corrugated cardboard turn into a rock-solid, wall-sized structure right before your eyes? That’s totally what happens here!
It all kicks off with measuring and cutting clean lines to carve out windows and an entrance, locking those panels together at the corners with hot glue. Up front, a wide opening turns into an actual serving window, complete with a projecting shelf that makes a totally realistic counter for kids to dish out toy treats or pretend to run a shop… Instead of leaving the cardboard looking raw and exposed, the whole exterior gets wrapped in a pale wood-grain finish that completely hides the seams and gives it a slick, polished look! Toss on some dark, overlapping pieces along the roofline for a cute storefront awning… and look at the final reveal… that boring old cardboard is suddenly a full walk-in pretend shop decked out with string lights, colorful play food, greenery, and a bright floor mat!
Here is the step-by-step process broken down into a table to make thing more clear:
| Step | What to Do | Materials or Tools | Helpful Tip |
|---|---|---|---|
| 1. Gather large cardboard panels | Collect several large, flat sheets of corrugated cardboard for the front, back, sides, and roof. | Large cardboard boxes or sheets | Use thick, undamaged cardboard so the playhouse can stand upright. |
| 2. Decide the playhouse size | Measure the available floor space and choose a height and width suitable for children. | Measuring tape, pencil, paper | Make the doorway tall enough for children to enter without bending too much. |
| 3. Plan the layout | Sketch the front serving window, side window, doorway, counter, and roof before cutting. | Pencil, ruler, notebook | A quick plan helps prevent weak or uneven wall sections. |
| 4. Mark the wall panels | Draw straight cutting lines on the cardboard for each wall and opening. | Long ruler, marker or pencil | Keep enough cardboard around every window to support the structure. |
| 5. Cut the main panels | Cut the front, back, and side wall pieces to the planned dimensions. | Utility knife, cutting mat, metal ruler | Make several light passes rather than forcing the knife through at once. |
| 6. Cut the serving window | Create a wide rectangular opening in the front panel for the shop counter. | Utility knife, ruler | Position it at a comfortable height for the children who will use it. |
| 7. Cut the side windows | Cut one or more narrow rectangular windows into the side or rear panels. | Utility knife, ruler | Matching window sizes make the playhouse look more polished. |
| 8. Cut the doorway | Create a tall opening in one side panel so children can enter and exit easily. | Utility knife | Round or reinforce the corners to reduce tearing. |
| 9. Strengthen weak edges | Add extra cardboard strips around the windows, doorway, and panel edges. | Cardboard strips, hot glue | Layering cardboard improves stability around large openings. |
| 10. Join the wall panels | Apply hot glue along the corrugated edges and connect the walls at right angles. | Hot-glue gun, glue sticks | Ask someone to hold each wall steady while the glue cools. |
| 11. Reinforce the corners | Glue additional cardboard strips inside each corner. | Cardboard strips, hot glue | Internal corner braces help prevent wobbling. |
| 12. Install the back wall | Attach the rear panel to complete the main box-shaped structure. | Hot glue, cardboard panel | Check that the walls remain square before the glue sets. |
| 13. Build the serving counter | Cut a long cardboard shelf and attach it below the serving window. | Thick cardboard, hot glue, ruler | Use two or three layers of cardboard for a stronger counter. |
| 14. Support the counter | Add triangular or rectangular braces underneath the shelf. | Cardboard offcuts, hot glue | The counter should hold lightweight toys, not heavy objects. |
| 15. Add interior shelves if desired | Install small shelves inside for toy food, cups, or pretend-shop supplies. | Cardboard, hot glue | Keep shelves shallow so they do not reduce the play space. |
| 16. Prepare the roof panel | Cut a flat cardboard piece slightly larger than the top of the playhouse. | Cardboard, ruler, utility knife | A small overhang creates a more realistic kiosk shape. |
| 17. Attach the roof | Glue the roof panel securely across the top of the walls. | Hot-glue gun | Reinforce it from inside with extra cardboard strips. |
| 18. Cover the exterior | Apply pale wood-grain paper, adhesive vinyl, paint, or decorative paper over the outside walls. | Decorative covering, glue, sponge or smoothing tool | Work slowly to reduce wrinkles and trapped air. |
| 19. Smooth the surface | Press the covering firmly onto the cardboard, especially around seams and corners. | Sponge, cloth, plastic scraper | Trim the covering neatly around windows and doors. |
| 20. Finish the window edges | Add narrow cardboard or paper strips around the openings to create clean frames. | White cardstock, painted cardboard, glue | Contrasting trim makes the windows stand out. |
| 21. Make the dark roof trim | Cut dark gray craft foam, cardstock, or thin cardboard into overlapping pointed pieces. | Dark craft material, scissors, hot glue | Layer the pieces to imitate roof tiles or an awning. |
| 22. Attach the awning | Glue the decorative dark trim along the front roofline. | Hot glue | Keep the overhang light so it does not pull on the cardboard wall. |
| 23. Decorate the counter | Add colored paper, toy cups, pretend treats, signs, or small artificial plants. | Craft paper, toy food, glue | Keep all decorations lightweight. |
| 24. Add lighting | Attach battery-operated string lights around the serving window or roof edge. | Battery-powered LED lights, tape or glue dots | Avoid plug-in lights and anything that produces heat. |
| 25. Add a floor mat | Place the finished playhouse on a green mat, foam tiles, or a clean rug. | Floor mat or foam sheet | A mat helps define the play area and protects the cardboard base. |
| 26. Check the structure | Inspect the walls, roof, counter, and doorway for loose pieces or sharp edges. | Tape, glue, scissors | Reinforce anything that bends or shifts before children use it. |
| 27. Set up the pretend shop | Arrange toy food, cups, play money, menus, and other role-play items. | Pretend-shop accessories | Rotate the theme between an ice cream shop, café, market, or bakery. |
| 28. Supervise play | Let children enjoy the finished shop under adult supervision. | Completed playhouse | Keep climbing, sitting on the counter, and rough pushing off-limits. |
The comment section blew up with so much warmth, hilarious jokes, and total love! One viewer cracked everyone up commenting, ‘This won’t fit in my rabbit’s cage cuz it’s too big and btw my mum has allergy’s that’s why I can’t let her in’—showing how people were picturing this as everything from a kid’s playhouse to a giant pet hideaway! Others kept it simple, calling the finished piece straight-up ‘Beautiful.’
And honestly, those reactions hit the nail on the head! You’re taking something people literally toss out every day and turning it into a magical hub for storytelling, pretend play, and genuine family memories… Parents can instantly see their kids taking orders for ice cream or snacks through that little window, while crafters are obsessing over how cheap and insanely clever it is to upcycle old packaging like this!
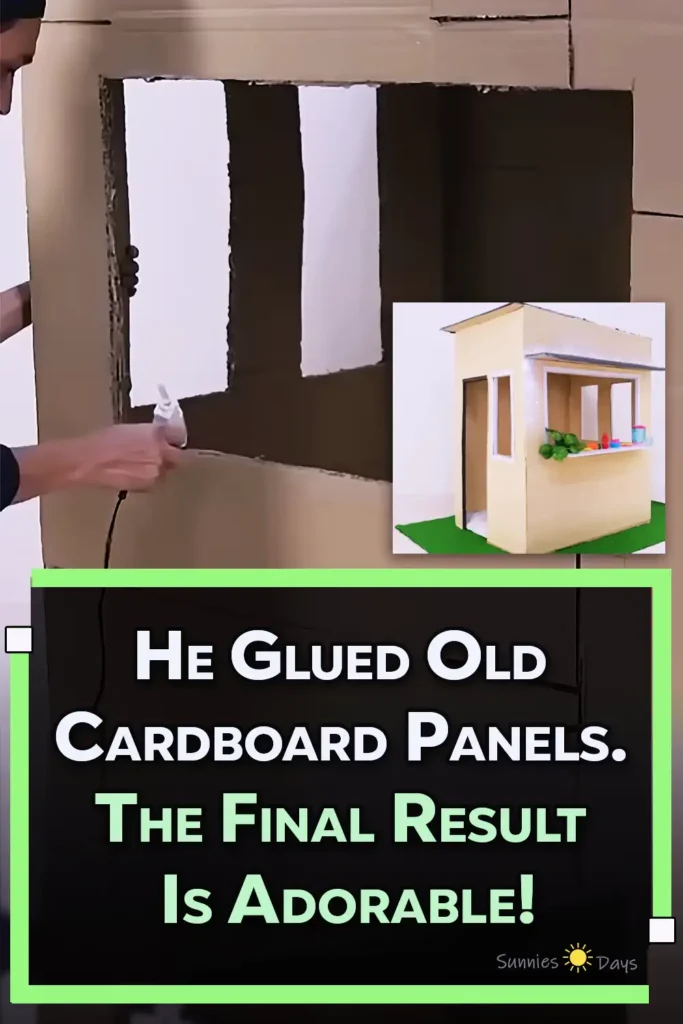
In a world absolutely wall-to-wall with tablets, battery-operated gadgets, and crazy pricey toys, this DIY cardboard ice cream shop is such an insanely refreshing break from it all. Kids jump right in—cooking up hilarious characters, scribbling custom menus, taking fake orders, and spinning entire games around a single box setup. It goes way past being just a cute little cardboard build; it’s a full-on interactive playspace tailored specifically to how kids’ minds actually run wild. You grab a couple of sturdy boxes, throw in a little measuring, team up with an adult, and boom—plain old discarded cardboard turns into a bustling mini storefront overflowing with non-stop laughs, leaving them with memories that stick around forever.