Craft Ideas, Woven & Basket Crafts · Easy · 30 minutes
DIY PVC Pipe Weaving Loom for Small Textile Projects
Make your own weaving loom using simple PVC pipes for fun and creative small textile projects. This DIY loom is perfect for beginners and kids alike.
- Difficulty
- Easy
- Time
- 30 minutes
Materials
- PVC pipes
- PVC elbow joints
- Saw
- yarn
- comb
How to make it
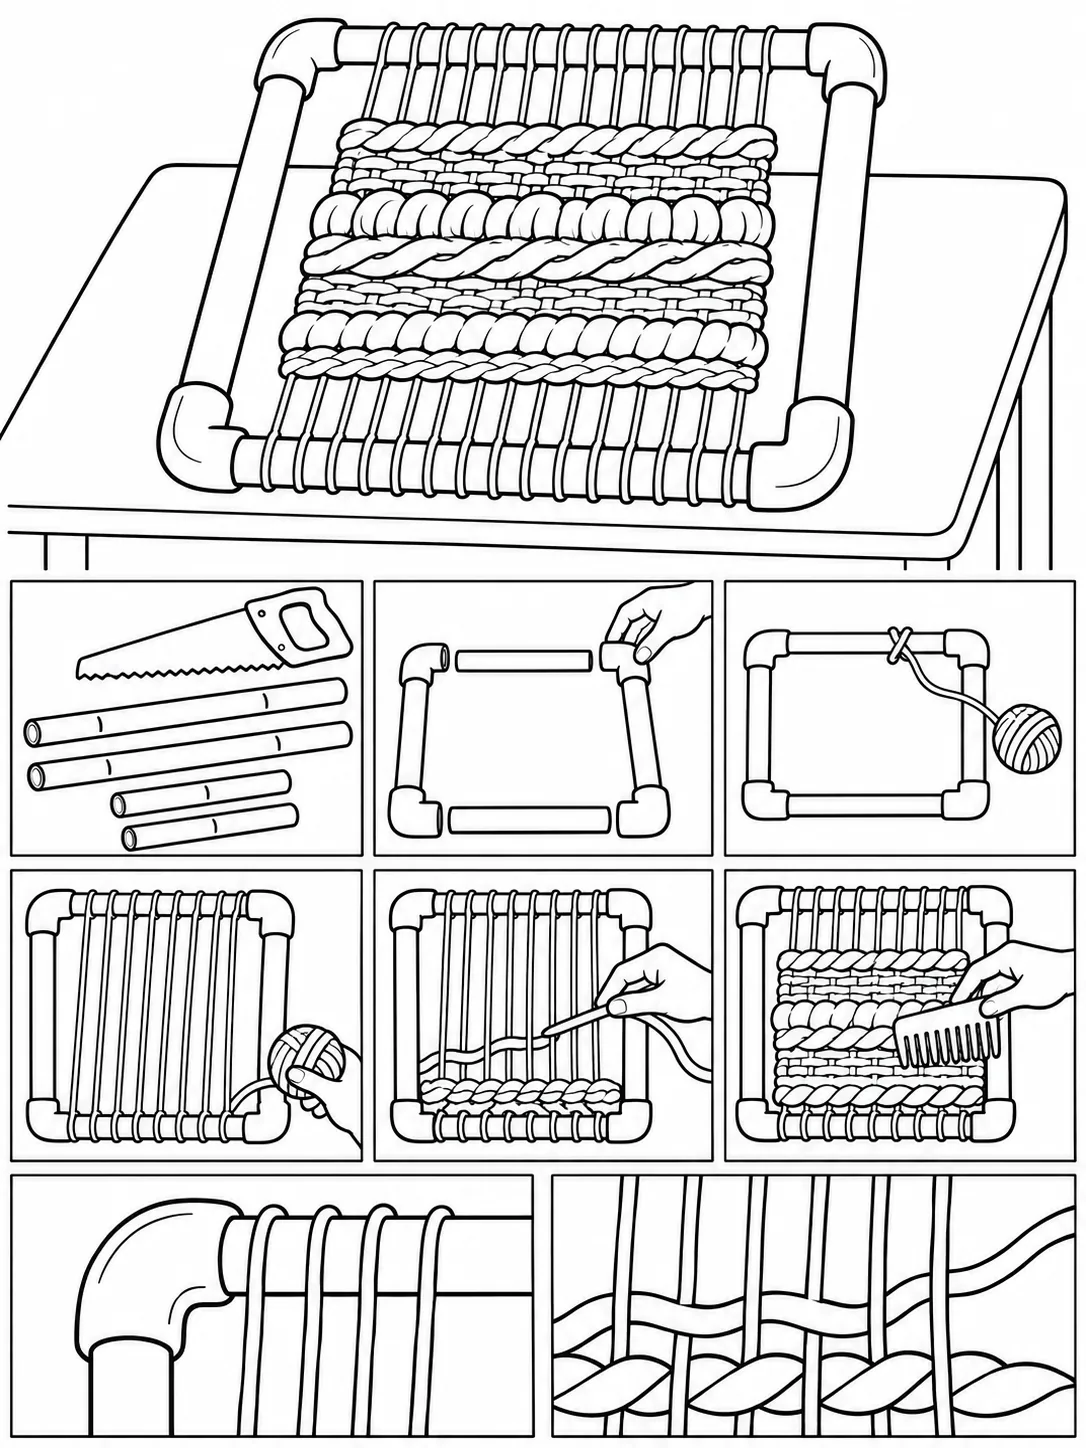
- Cut PVC pipes to equal lengths using a saw.
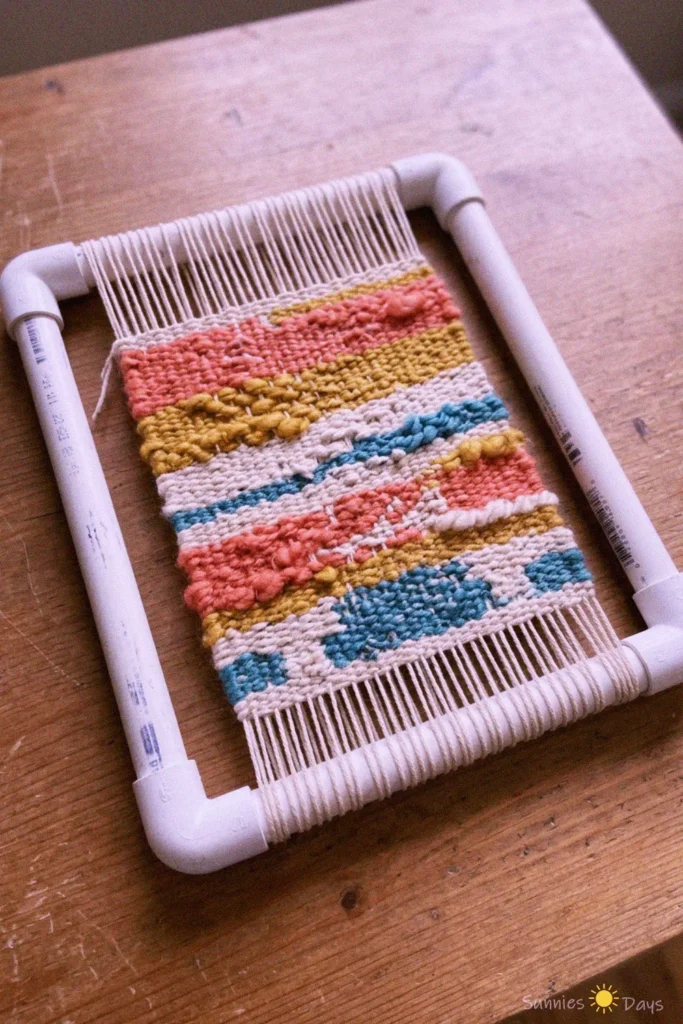
- Connect the pipes with PVC elbow joints to form a square frame.
- Tie one end of the yarn to the frame.
- Wrap the yarn vertically around the frame to create the warp threads.
- Begin weaving thicker yarn horizontally through the vertical threads using an over-under pattern.
- Use a comb to push the woven yarn tightly together.
- Continue weaving until the desired amount of fabric is created.
A diy pvc pipe weaving loom is a simple and effective tool for making small textile projects and practicing weaving skills. This homemade loom is great for beginners who want to explore weaving without investing in expensive equipment.
The PVC pipe frame is lightweight yet sturdy, making it easy to handle and move around your workspace. Its compact size is perfect for small projects, and the bright yarn colors add a cheerful touch to your creations.
When using PVC pipe for crafts, ensure all pipe edges are smooth to avoid snagging your yarn or scratching your hands during weaving. Work on a flat surface for best results.