Want to paint your room like a seasoned professional? This DIY guide provides all the essential skills, tools, and techniques to achieve a flawless finish without falling into the costly and time-consuming “tape trap.”
Today, you’re going to learn how to paint like a pro, but as a homeowner.
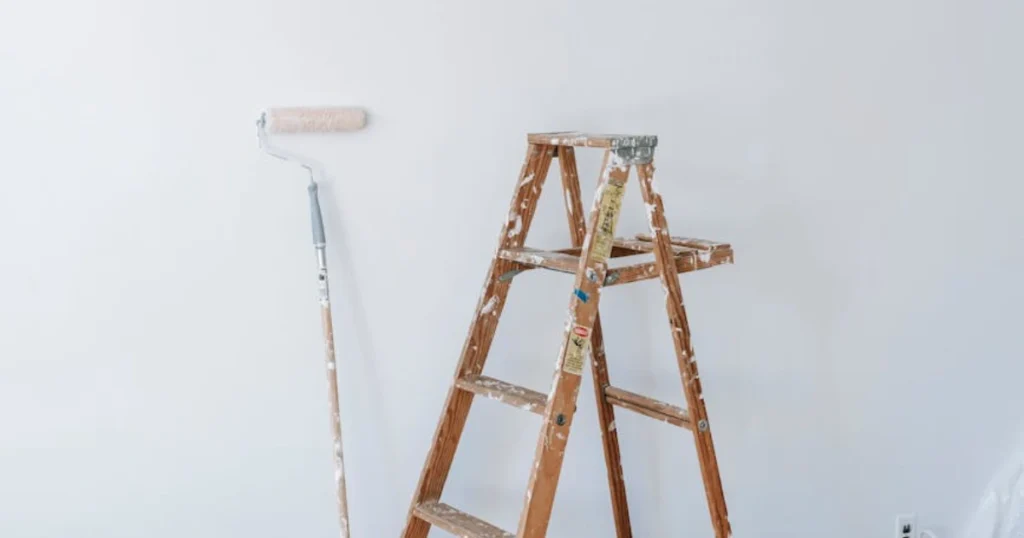
All the skills needed will be taught, and the tools will be shown. This is the rig; as a professional painter, this is all that is needed.
All the stuff can be packed in a napsack and taken to work. It’s not that tricky. Techniques and skills will be demonstrated so that the tape trap can be avoided.
So they suggest using $40 worth of tape all over the room and wasting half the day doing it. This guide will show how to avoid that. It will show how to paint a hallway as fast as it can be taped.
So no blue tape, let’s just get right into the skills and tricks. Everything needed to know will be taught in this guide so that the art of painting can be mastered.
Knowing how to paint allows for making changes to a house that gives the greatest return in investment.
It makes no difference if it is inside, outside, or kitchen cabinets. After reading this guide, one will have the skills and confidence to do it. On the scale of difficulty, painting is like number one.
It’s the easiest thing there is to learn, but it’s the greatest skill to have because if one can’t paint, one can’t finish. If one can’t finish a project, one shouldn’t be starting.
So let’s learn this skill. Let’s dive through and see everything one needs to learn. Let’s just jump right into the rig.
Essential Tools for Professional Painting
Here are the must-haves:
- A paint tray.
- A liner, especially as a homeowner, because the liner allows one to finish the job and just throw it in the garbage, so everything doesn’t have to be washed. This little yellow arm is nice to have, but it’s not a definite.
- A nice cage, like the woster cage. Links for all of the tools will be available in the description.
- The woster Sherlock handle. This slides in and has a pin and does positive lock. Never again will painting have to be done while the handle’s spinning off; this is amazing.
Once that’s set up, there’s the ability to extend it and retract it. This rod reduces work by about 60 to 70%. It makes the job effortless. A sleeve is also needed.
Microfiber is used; this is a 18 mil. Also needed is a 3-in angle brush. This 3-in angle brush doesn’t have to cost a fortune; a good one can be gotten for about 20 bucks. Then a 5 in one tool is needed.
This is a scraper, and it’s used as a screwdriver. Also, when the day is done, it will clean all the extra paint out of the roller sleeve. By the time one is done painting, almost a quart of paint will be sitting in this thing.
This makes sure that one doesn’t have to spend so much time washing the gear. It also puts the paint back in the can, so it’s available for touch-ups later. An ala knife is also needed, because has there ever been a job where a knife wasn’t pulled out at least once?
Of course, a ladder is needed if one is vertically challenged. Some sort of a sanding pad is needed. A good paint job is all about the preparation, and if one isn’t sanding in between coats, one will get a poor performance.
This guide won’t share all about patching and touch-ups and all the repairs. There are other videos for that; a link where that can be checked will be put in the description.
The Key to a Good Paint Job: Quality Paint
What separates a good paint job from a bad paint job is the material. It’s the paint. Different paints have been used for a long time. C2 has been used for the last 12 years on and off in different jobs. This paint is loved for its high washability and high wear. It is great for high-traffic areas. They have proprietary technology. They use a polyway as the hardener. The strength in this paint isn’t coming from an oil-based product.
So there’s no resins, which means there are no shortage, no supply issues, which is why this is being promoted right now. The other thing is that it has very low voc’s, which means when the house is painted, it doesn’t smell like it was painted for a week. No headaches.
When it comes time to paint, all that has to be done is clean the space, put down a tarp, and then remove all the cover plates because this is where the preparation comes in. That’s where the knife comes in handy. Back out all the screws, take all the cover plates off, and do not paint around cover plates; that is not cool.
The purpose of this guide is not to show how to paint from new drywall. It’s to show how to repaint. Most people want to do a paint job because the color’s ugly, or they’re living in a brand new house and the Builder used really cheap paint and they can’t wash the walls.
Step one is grab some trim paint and fix all of these mistakes where they were painting the wall and they got the wall paint all over the trim. This isn’t cool because if a nice job is done, there will be three colors sitting right there.
It’s going to scream. So before starting, take some trim paint and make sure that edge is painted. It doesn’t matter if it gets all over the wall because one is going to come back and cut a new line, but make sure that any old paint is covered up. The same holds true for the ceilings.
It might be found that the whole ceiling has to be painted. If a ceiling needs to be painted, start with a clean palet. If it is needed to learn how to paint a ceiling, it’s a little different technique. There’s a different set of rules when painting ceilings. It’s just about the direction one wants to paint.
Preparing Walls for Painting
Once the ceiling lines are cleaned up and the trim lines are cleaned up, one will want to sand. Just use a sanding sponge if needed. One doesn’t have to spend good money on a rig. When the builders painted this, they did not do any sanding, and the walls feel like sandpaper. Well, this wall has to be sanded properly. The coolest thing is that one is ready to paint right now. No tape. Don’t waste any time.
There are two things that the painting World never teaches homeowners. They never teach them to sand, which is amazing because the difference in a wall that’s been sanded versus a wall that hasn’t been sanded is the touch. One can walk into any house in the world and just go like this, and if it’s not smooth like a baby’s bum, it wasn’t sanded. It feels gritty; it feels like a dirty wall.
One of the reasons they don’t tell to sand is because they want people to not be happy with the finished product, so they buy another gallon of paint and try doing it all over again. The other thing they never tell is to use a paint stick.
This is a lot easier. An extendable pole can be used to keep the hands below the heart when working, which means half the work. There’s not all the stress in the forearms because one is holding the darn thing. Two hands can be used, half the work again. On top of that, a much even distribution of the paint can be gotten. It’s going to blow minds how easy this is.
The color here is babaan from C2. There’s a new arrangement with C2 paints, so this great affordable quality paint can be gotten. This is one of the highest quality paints on the market today. It definitely Rivals Benjamin more. C2 doesn’t use oilbased resins to make their paint hard and washable, so they don’t have supply issues.
The paint brush is brand new right now, which means it doesn’t have anything loaded into it. About 2.5 inches of paint is left in this can. The paint is being pushed into the brush until it gets loaded up enough. The ceiling line won’t be cut now. The wall here is a flat paint oddly enough. So the first coat of paint should be applied before trying to be too delicate and get too close to the surface, because the paint doesn’t slide onflat paint.
Techniques for Cutting Corners and Trim
Generally speaking, outside corners are sharp edges. The heel of the brush should be used, which is this part right here. Set the brush on it, and it’ll fan out again. Draw about a/ qu inch away, and a ridge paint will be gotten. Now come back with the paint, and it can just be drawn right up against the edge of that corner. A roller should never be used here. When standing on the other side looking this way, two colors shouldn’t be seen. This is the secret.
So if the heel is just used to draw a line, then that paint can be pushed right up to the edge. A perfect Edge will be gotten. That’s how the pr is cut in the corners. If the walls are going to be painted and the color is being changed, the baseboards and other trim won’t have to be painted again. It’s just like the ceiling, only upside down. The secret here is to be able to see underneath, so one has to get close to the ground.
If there’s just a little bit too much paint, and the brush marks can be seen, dust it out. Now it’s time to roll. So the cut in is done, and it’s time to do the rolling. Before doing that, remember that paints with a lot of technology and acrylic in them are being dealt with. It’s time to wash this brush. Don’t wait till the end of the job, or the brush will be garbage. That is a pro tip.
Rolling Techniques for a Flawless Finish
Working with a stick, it just passes, it just clears. So if it’s not extended, one can work all the way top to bottom, and that’s how it’s wanted to roll. None of this W business. Get this up here and just really lightly hardly touch the wall, and the paint will come off all on its own. Go about two rollers wide, and then go back where you started because there’s a lot of extra paint on that part of the wall.
Get close to the edge, but not over the edge, so about a half an inch away, and that’ll add texture to that earlier brush work. Always stop a few inches from the bottom and a few inches from the top. That’s why the cut line is about 4 in tall, so there’s never a risk of hitting the ceiling. An attempt is being made here to make the texture on the o consistent. Every paint company’s got a different coverage. The materials are made differently.
If the wall looks too wet and too thick, keep stretching this out until it’s not the case anymore. The coverage of this paint is awesome. If there is saggy texture or it’s a little different, just back roll now that the roller is getting dry. It’ll pick up the extra paint off the wall, and it’ll make sure everything looks the same.
This is not about speed, this is about perfection. Let’s not be like these guys that are out there with a double wide roller trying to paint a whole wall in 9 seconds. That’s a disaster, it always is. Because this paint has great coverage, a bit of a gap will be left this time, so when back rolling, we can roll back onto it.
There’s a law in painting it’s called the wet Edge. The wet Edge is right here, and one always wants to be painting where the wet Edge is before it starts to dry. Paints nowadays have a lot of technology in them, and it might say on the can it takes 2 hours to dry, but that’s just because there are still houses out there that are laugh in plaster.
The best thing about modern paint is that about an hour after the first coat has been done, the second coat can be started. If there is conditioned air, air conditioning or a decent heating system in your home, it’s not going to be a problem. Just throw a fan on for a few minutes and help speed up the drying process. Then one will want to sand one more time. Check your walls; you’ll feel it.
Because this paint is only an hour old, all the changes of where something was sanded off this wall will be seen. The truth is camera’s lie. Everything that’s being looked at on is better than it does in reality. The secret is when doing your paint job, just trust the sanding in between coats. Feel the wall before and after; the difference in the texture will be amazing. This is the secret to having a great finish.
The guide will now show how to do the second cut because the second cut is where the Precision line is gotten. Whenever a flat surface is being painted, the Precision cut needs to be done on the second coat. There’s not as much resistance, so a lot of paint isn’t needed in the brush, and a perfect line can be drawn without having it snow plow up. The brush should be pushed in, it should be loaded up, and then it should be cleaned off. Not too much paint is wanted; it should be inside the brush, not on top of it.
Now, a nice long straight line will be run again right underneath the other one, but this time the brush will be pushed right into the crack, right into the crease. It can be come at from either side, and the tip of that brush is going to be used. That’s how a nice straight line is gotten. If too much paint is used, or too hard is pushed, or too quick is tried to be, it’s going to be pushed all over the ceiling. Just a little bit of pressure, and because one is painting from inside the brush, the bristles can actually be put right into the corner, and it’ll come up perfect.
When doing your second coat, every wall surface that is being painted, all the cut on one wall is painted, then that wall is rolled, and then one moves to the next one. The first coat, it’s okay if the lines in the roller can be seen, it doesn’t really matter. The first cut takes a long time, but once that first coat dries, make sure one is finishing one surface at a time.
When doing the second roll, start where the cut-in was started, so that the wet roller contact is achieved with the wet brush work. Resist the temptation to use too much product. It can be told when Quality Paint is being used. Great hide is already gotten, so just looking for an extra 30% hide, so it can be stretched out. The only other thing wanted to do is try not to roll dry. Don’t roll it so it gets so dry that too hard is being pushed. It just makes it a lot of work. The stick should be able to just be moved up and down without putting a lot of pressure, and get the job accomplished.
After two coats with the bright kind of finish and good distribution of the paint, a really good look is gotten. Most paints on the market that have a high washability and high durability technology are also a 30-day curing process, that means that after the painting has been done, it might be dry within a couple hours, it might feel nice and hard the next day, but resist the temptation to hang pictures or Mount fixtures or anything like that on a freshly painted surface for at least 48 Hours.
Give It 2 days. Make sure it really starts to get hard. After 30 days, one can then be free to do any kind of washing. If some dirty fingerprints or some Crayon is gotten on the paint, don’t wash it off for the first 30 days because the curing process will be interrupted, and that smudge mark will be gotten, which will wreck the paint shop.


